Sunday 29 December 2013

Ciao 2013!

I had thought that 2013 was going to be bad. Plain and simply. I did not like the number. The first half was,  and I suffered for it, then having to deal with my disappointment in the summer. But then my Autumn term was fantastic, and I had some of the best people around me, and the best times I've had in a long, long time. 2013 has been about 'building character', and I feel a better person for it.
 
I have put a decent effort in to this blog this year - I even sustained my August challenge for posting everyday (bar one). And here are some promises I have yet to keep:
 
1) I will finish my travel scrapbook. I still need to print out photos.
 
2) My 50 has been extended as part of my 2014 Resolution. I'd love to finish my list.
 
3) I will again try and post frequently, although A2's are very important, so begin wishing good luck now, if you please!!!
 
4) This  year I participated in the December Daily Challenge, and I have nearly completed documenting all the way up until Christmas Eve, with hopefully a mini celebration of Christmas at the end. However, I still need to print photos....
 
2014 will be a year of change again. Next year I should be off to University, to study History. What I have learnt this year is that documenting what goes on, and finding the positives to flick through, is very good for my mentality. This means art journals and Scrapbooks. So hopefully, even if I'm not sharing it here, some form of craftiness will be occurring somewhere in my life.
 
Thank you for sticking with me for this year, and I hope that 2014 will bring you hope and happiness too.


Friday 6 December 2013

We Three Kings of Orient are...

...One in a taxi, one in a car.
One on a scooter, blowing its hooter,
Smoking a big Cigar.

I know. I sing wonderfully.


Equipment:
Gold Card blank
Paper scraps in Gold and black
Outline stickers
Glue

1) Trim a strip of Gold Card to the same height as the width of the Card Blank. 

2) Arrange three stickers of the headdresses (hats. I prefer hats, but they don't look like hats) onto this gold strip.

3) Attach to a strip of Black card that is the same height but 2cm wider.

4) Glue down the decorated strip, and arrange three sticker diamonds in the bottom corner.

Ta da!

Number of items used from stash: 2
Gold Card, Stickers

Wednesday 4 December 2013

Sparkle

I love glitter,but hate the mess. Glitter outline stickers solve this problem no end.


Equipment:
White Card blank
Glitter stickers
Ribbon

1) Tie the Ribbon into a bow around the bottom of the card blank.

2) Arrange the glitter stickers onto the top half of the card.

Ta da!

Number of items used from stash: 2
Stickers, Ribbon

Monday 2 December 2013

Button Red

A GREEN Card today...I've mainly been using white card this year, but I began to ran out,so in the spirit of using up my stash, I turned to this colour as well.


Equipment:
Green Card Blank
Patterned paper
Ribbon
Buttons
Felt star
Corner Rounder
Glue

1) Tie the ribbon around the patterned paper so that it forms a bow.

2) Attach a button to the centre of the felt star.

3) Glue the star onto the patterned paper, next to the ribbon bow.

4) Round the two corners of the patterned paper closest to the star, and attach the opposite flat edge to the front of the card.

5) Round the outside corners of the card blank and attach two more buttons to the side of the patterned paper.

Ta da!

Number of items used from stash: 6
Buttons, Paper, Ribbon, Star

Sunday 1 December 2013

Christmas Green

Green and white looks so good together, and it makes a refreshing change to the usual red and green.


Equipment:
White Card Blank
Ribbon
Circle sentiment
Scalloped circle
Foam Pads

1) Attach the ribbon across the bottom half of the card and secure on the wrong side.

2) Using foam pads, layer the Circle sentiment onto the coordinating scalloped circle.

3) Adhere the scalloped circle on top of the ribbon using foam pads.

Ta da!

Number of items used from stash: 3
Ribbon, Sentiment, Circle

Friday 29 November 2013

Circles

This one is plain and simple, and the cold blues go well with the white.


Equipment: 
White Card Blank
Circle embellishments
Border with words
Glue

1) Attach the border across the lowest third of the card blank using glue. Make sure that the writing is fully visible, as this will act as your sentiment.

2) Arrange the two circles on the card and glue down as well.

Ta da! So Simple, yet effective

Number of items used from stash: 3
Circles, border

Wednesday 27 November 2013

Deck the halls...

...with boughs of holly!

A running theme that may start to occur with my cards is their simplicity. I find these sorts of ideas great if there are a lot of cards to make, or if you want a quick repeat design.


Equipment:
White Card Blank
Patterned paper
Ribbon
Glue
Outline Sticker Sentiment

1) Cut the patterned paper to half of the card blank. I chose this one as the holly appeared to hang from the centre. Adhere to the lower half of the card.

2) Tie a Coordinating ribbon into a bow across the front of the card, covering up the paper join.

3) Add an outline sticker sentiment on the plain top half  of the card.

Ta-da!

Number of items used from stash: 3
Paper, Ribbon, Sticker

Monday 25 November 2013

Layers

More Christmas Cards this week! Yay!


Equipment:
White Card Blank
Paper Scraps: I had some handmade paper and that silver sort of netting stuff....
Paper Embellishments
Ribbon
Chipboard Sentiment
Glue
Foam Pads

1) Tear the handmade paper to fit onto the card blank. I found that using a paintbrush and water worked well. Glue down.

2)Tie the ribbon to the edges of the Chipboard sentiment and add foam pads.

3) Arrange the other elements to the card and stick down.

4) Adhere the chipboard sentiment with the foam pads.

Ta da!

Number of items used from stash: 6
Paper, Net, Snowflake, Star, Sentiment, Ribbon

Sunday 24 November 2013

Baubles

This one is inspired by this card, and I love how simple it is! And, just one month to go! EEK!


Equipment:
White Card Blank
Bauble Die Cuts
Foam Pads
Black Pen
Corner Rounder

1) Using foam pads, arrange the two baubles on the front of the card.

2) Draw black lines for string and write greeting below.

3) Round corners of the card blank.

Ta da!

Number of items used from stash: 2
Bauble die cuts.

Friday 22 November 2013

Ribbons

Another Christmas card to brighten up your November!


Equipment:
Square white card blank
Patterned paper
Ribbon bow
Card Scrap
Gold outline stickers
Glue

1) Trim patterned paper so that it sits with a 1cm border on the card blank. Glue down.

2) Wrap a ribbon bow (I kept mine from an old bunch of flowers) around one side of the card, and fix to the inside of the card using your preferred method (I like sticky tape).

3) Cut out the scrap of white card and round the end corners. Position the outline sticker greeting on it.

4) Glue the sentiment so that the end of the card is underneath the bow of the ribbon.

Ta Da!

Number of items used from stash: 3
Paper, Ribbon, Stickers

Wednesday 20 November 2013

Candy Canes

Hello, Christmas cards again!

Look familiar? It is very similar to this one I did last year. A good example of where multiple ideas can spawn from the same items.


Equipment:
Square White Card blank
White Card
Patterned paper
Ribbon
Candy cane embellishment
Mini 'Christmas' tag
Foam pads
Glue

1) Trim the spare white card to a 10cm square.

2) Across one side, wrap the ribbon and secure at the back in your preferred method.

3) Attach the Candy Cane embellishment above the ribbon.

4) Adhere the mini tag where the candy cane crosses the ribbon.

5) Trim the patterned paper to a 13cm square, and glue onto the card front. Centre and attach the decorative panel using foam pads.

Ta Da!

Number of items used from stash: 4
Embellishment, Tag, Ribbon, Paper

Monday 18 November 2013

Purple Snowflakes

Another Card to show you! Hoorah! 

This one turned out much better than I had expected. I'm usually pretty dire at anything like stamping, but this turned out really well, so smiles all round!


Equipment:
White Card Blank
Pink and White card
Pink Ribbon
Snowflake Embellishment
Snowflake Stamp
Inkpad
Foam adhesive

1) Using your stamp and Ink (my ink was purple), stamp onto the white card to create a background. Trim down to an 8X8cm square, and round the corners.

2) Wrap the ribbon around one side of the patterned card, and secure at the back with your favourite method ( I use tape).

3) Position and adhere your snowflake embellishment on top of the ribbon.

4) Trim the pink card to a 9cm square, and round its corners. Adhere the patterned panel to the pink square using foam pads. Attach all of this to the card blank, also with foampads.

Ta da!

Number of  items used from stash: 4
Snowflake embellishment, ribbon, pink card, stamp & ink

Sunday 17 November 2013

Red and Gold

This year, I've set myself a challenge. I was only allowed to buy my stash one new thing for all of my Christmas cards. It been pretty tough, but I really like some of the results I've been getting. So I'm going to show you some of the things you can do, and let me know if, like me, you long for your huge pile of craft supplies to diminish (so you have a valid excuse to buy more!).

This one, I hate that the bow is lop-sided, but otherwise I feel it's a rather sophisticated card.

Equipment:
Gold Card Blank
Red Card
Gold patterned vellum (mine says Christmas over it)
Red Ribbon
Red Gems
Double sided tape
Foam Pads
Glue
Scissors

1) Trim the vellum until it measures 9cm X 10cm. Trim the red card to 10cm X 11cm.

2) Matt the vellum onto the red card using double sided tape.

3) Tie a bow with the red ribbon. Use Glue to secure the knot, and cut a pennant into each of the tail ends.

4) Glue the bow to the centre of the vellum piece. Attach this panel to the top of the card using foam pads.

3) Beneath this, glue 3 red gems for detail.

Ta da!

Number of items used from stash: 6
Ribbon,Vellum, Card Blank, Gems

Saturday 16 November 2013

DIY: Decorated Tealights

Earlier this week, I was fortunate to guest post over at Running with a Glue Gun. I thought today I'd share the DIY I prepared here as well.

 I have these decorated tealights to show you, and they make great last minute gifts, just in time for Christmas. Also the colours and decorations are completely customisable,so you each one can be completely individual!


Equipment:
Tealight candles
Ribbon
Double Sided Tape

Optional:
Decoration such as gems, bows etc.
Glue Gun, Glue Dots or Super Glue (depending on strength and size)


Step 1: Check that your ribbon is not taller than your tealight, as this could potentially be a fire hazard.


Step 2: Attach enough double sided tape for the circumference of the tealight to the wrong side of the ribbon. Trim to a straight edge


Step 3: Take off the backing of the tape, and wrap around the tealight, trimming once all of the sides are covered


Optional: Decorate your tealights further using small embellishments, but keep in mind the potential hazard of lots of loose fabric.

Ta da!

Friday 8 November 2013

When we played Catch

Sometimes, you just have to cling to the moments that make you happiest.

I've found this subject very difficult, and I often don't allow myself to be happy. But it's those unconscious slips where I suddenly find myself being happy that I cling to, no matter how short, how spontaneous or how trivial. I want more of them. So they deserve to be documented. In this way,when I fall into a low, I can find them again.

On a Thursday, last thing, we have a form period where various pieces of admin occur. Currently we are preparing Christmas Shoeboxes for Operation Christmas Child. And we had a spare bouncy ball.

It started with me, bouncing it off of the desk.
Then Beth asked me to throw it to her, and we played catch.
Soon there was Mignonne, Nikki and Tom.
Then we tried to get it into the fire bucket.
And we played piggy in the middle.
And then we returned to playing catch, bouncing it off of the cupboard doors.

It sounds far too simple.
But the excitement and sheer concentration, competitiveness and frivolity of us near-adults, over a small, bouncy ball, was somewhat astonishing. The relief it gave over its simplicity broke the trend of the serious nature of A-Levels. I laughed and I smiled, and while others looked on at us thinking us childish, I didn't care. It was fun.
It forces me to acknowledge the friends I have, and to appreciate them for all they're worth, because they are worth far more than me. They see me through all of the guarded, upset,conflicted Rachel, and help to reveal the light-hearted one. 
They are the best people in the world.

Sunday 3 November 2013

Autumn Shades


It's been a while since I first introduced you to my art journalling. I have found that I use it to be the complete opposite to what my A-Level course demands: free, brightly coloured and a general expression of what goes on in my brain. Some of my pages are too personal for me to ever consider sharing, but I hope that you enjoy this selection on the theme of Autumnal, leafy shades!

School is tough, and I am wading my way through coursework, personal statements and physics tests galore, but finding time to craft is difficult. I have, however,started my Christmas Cards and Christmas Gifts,which make me very happy,although I must remember that my sister's birthday comes before the Christmas Holidays, and that means I need to make something at least passable before the week where I hope to make her a Cath Kidston-esque quilt, which if you like, I could show my step by step process. 

I hope to post again soon, but I wonder what this next half term shall bring me!

P.S. While Yes, this past week has been the half term holiday, I have an excuse! I was in Edinburgh! Lots of lovely pictures and I adore the University, so perhaps I'll share some soon!

Sunday 27 October 2013

Oh Blergh

Yes, after my long silence I reward you with: teenage troubles that have nowhere else to go...


On Thursday I received a cryptic text from one of my friends from school. It read:
'I know someone who likes you.'
Sounds straight forward? Well it should be, but I have received similar messages which end up being completely benign.

Anyway, Friday dawned, and walking to school from the bus, I was ambushed by said friend, where it was announced that this actually wasn't a joke.

*Instant Thoughts Running Through Mind*
Maybe its the guy I like? 
But what if its horrible?
 Or I don't even know him (which isn't hard to imagine, I'm useless with people names and anything else that is used to form memories of people)
This could still turn out to be another joke!

I was then informed that it was someone in my form.

Oh no.

Then:
'It' someone who can look up to you'

Great. Short. I know who it is.

I mean he's a good person, and I'd call him a friend, but not in that way. What's worse is that, after other digging, it's been circulating the sixth form centre, and I had no idea. This means, due to some 'independent school guy code' the boy I like probably won't even admit anything until either a) I've turned the other one down or b) the other one finds a new girl to hit on.

Ether way I'm doomed, so I might as well focus on my work.

P.S. I was thinking about changing the purpose of this blog: any free time I have is either minuscule and I'm fuming over something, or I take it up with what little crafting I can do. I just don't want to turn this into a lifestyle blog if no one wants to. I'll get a new blog and let this one go dormant. Let me know what you think.

Sunday 29 September 2013

Good Grief, September

It sounds like I should be in a period drama, addressing a girl called September who has just announced a scandal. At least, in my head it does.

So. September has nearly flown away in a blink of an eye and I have barely started my Christmas presents. Don't panic Rachel, not yet, don't panic. I do have excuses to serve them all.

1) I am taking A Levels in History, Physics and Art. These take up time to do the work, but also getting used to the classes again.
2) I have a Physics class of three - me and two boys. One is lovely, one is most definitely not. I'm still getting used to how this is going to work.
3) I had a presentation to give to the governors as part of a prize competition, got very worked up, but hopefully could have clawed it back with my question answering skills.
4) The joys of being upper sixth - Tug of War, Bus Monitor, advice to younger students... Tug of War caused Pain.
5) Volunteering at the National Trust on Saturdays.
6)general life making me tired.
7) UCAS


But also, things to be glad about:
Downton Abbey
Skirts
Chocolate Cake
A Trebuchet
Rail Tickets
Friends

So perhaps September has been well balanced. But I must do more crafting...

Saturday 31 August 2013

August Review

So comes the end of the eighth month of 2013, and I nearly managed to provide a blog post for every day of this month. And it was difficult.
 
I am usually a sporadic blogger, if that, and attempting to find and fill that many posts in a short amount of time with sufficient content was, well, hard.
 
But you are the reader, you are the one who this impacts the most. I doubt I'll ever post as much as I did this month ever again without at least six months preparation for it, but if I were to keep a regular feature, what of the past months posts would you like to keep?
 
'My Favourite' Mondays?
 
Writing Wednesdays?
 
To-do Lists?
 
I don't know whether this has been a successful venture, so please tell me in the comments, and wish me luck with returning to school.
Thanks for sticking with me.

Friday 30 August 2013

Camera Experiments: Caves


The problem came when trying to balance that flash with the low level light, and getting a decent picture: These ones turned out ok!
From my holiday to Crete.


Thursday 29 August 2013

Hat Time!

It is once again time to think about the Big Knit, by Innocent Smoothies....


Knitting gorgeous, little hats! And all in aid of raising funds for Age UK!

I have already surpassed my total of *cough*four*cough* last year, and already have ten! And with about a month to go, I'm sure I can get a few more out as I cosy up in front of NCIS for the night! Perfect relaxation from school.

I am, however, in dire need for advice on what to put on my hats apart from pompoms - I hate them! and I can never make them small enough!
Do you have any ideas?

Wednesday 28 August 2013

Cheesy

When I was 13, I was a part of a school creative writing class. For Christmas, we had to write each other a story, like a Secret Santa, and it was allowed to be as cheesy as possible. I found it hilarious to write, as it just made no sense, it was clichéd and ridiculous.
 
Oh, and it had to begin with 'Once upon a time'...
 
Once upon a time, there was a girl. She had long, dark brown hair and twinkling brown eyes set into a round, olive toned face.  This girl could not feel the cold like others. She would run around her little village garden, in the snow with not a care in the world.
She played the violin too. She was so very talented with the small instrument; she could play for hours and hours. And it made such a wonderful sound.
One day, that little girl left her home country. It was late at night and she had already said her goodbyes. She packed away her violin and its bow and lifted the case. She walked slowly down the path and away. Away from the little green house that had been her home. She sailed across seas and past continents, searching. Searching for a place to belong.
It was a long, long time before anyone saw that girl again, several years, in fact. It was a group of explorers who had journeyed to the far south, to the Antarctic, that found her. They had never expected to find what they saw.
A huddle of penguins began to gather into a ring around a spot marked in the ice. They stood waiting, but all completely wild. The young explorers watched. And waited.
Suddenly, as if from nowhere, the girl padded across the snow, so silent with her bare feet. Her eyes were glazed, but there was a smile on her face. The young explorers watched fascinated by the girl who took her place among the penguins, who accepted her almost as brethren.
Slowly, softly, she took her violin and propped it on her shoulder. She began to play.
And the sky lit up with such an array of beautiful colours, pinks, blues, greens and yellows. The Aurora Australis.  The shimmering light patterns reflected in her hazel eyes and shone on her long brown hair. The adventurers watched the girl in awe. Secluded and lonely, silent but beautiful.  Here, was a girl who was at home. Here with the cold, the penguins, her violin and the light.


Tuesday 27 August 2013

Camera Experiments: Knitting as a subject


I never quite realised how intriguing knitting was as a subject: texture, lines, colour....
 
And yes, I nearly forgot again, but didn't , so there we go.

Monday 26 August 2013

My Favourite 10: TV shows

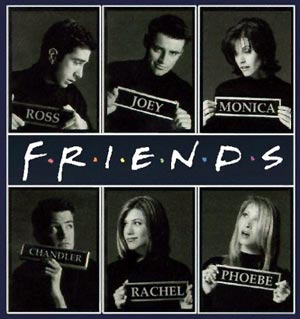
Friends
How can you not love Friends?! The story lines are funny, light-hearted, and there's a character everyone can relate to - I think I must be something like the third Geller child in my subconscious, as I am freaky about History like Ross, and like everything in its place like Monica!

 
NCIS
 Ah... McGee.... I'd never really watched a crime television programme before, so it surprised me that I liked this one. It may have something to do with the relation to the Navy, or the complexities of the characters - it's not just crime, their investigators are so cool! Abby is BRILLIANT.

 
JAG
Navy Again! I find this interesting as I was considering Law as a future option. Rabb and Mac does frustrate me, and I was annoyed when Chegwidden left, but they're funny, they're fluffy, and there are plot twists and good story lines.

 
M*A*S*H
You have already been on the receiving end of my M*A*S*H love if you are a long term reader here. They are quite possibly the funniest shows I have ever seen, admittedly from the 70s, but there is nothing wrong with that. Oh and guess what, it's the military again!

 
Doctor Who
How can you not love Doctor Who? It's a shame that Matt Smith is leaving, I don't feel the writers were good enough to give the same chance to shine as David Tennant did. Mind you, it must have been hard for him, trying to follow that up. Doctor Who is at its best when it scares you - I prescribe anything with Weeping angels.

 
Sherlock
Benedict Cumberbatch is fantastic, and the effects are amazing, when you see the calculations that run through his head scroll across the screen. Sherlock Holmes is one of those classic characters, and Benedict brings him perfectly to life in a contemporary setting.

 
Downton Abbey
The love affair continues despite the cruelty of Julian Fellowes. Gorgeous costumes, characters and stories, it was unfortunate that my favourite (Sybil) died. I was rooting for her and Branson right from the start. It's one of those series where you get so enthralled, you want to live and be a part of it, if only as an observer into that world.

 
QI
General Knowledge, Stephen Fry, and occasionally something about a Blue Whale, Alan? Marvellous.

 
Kirstie Allsopp's assorted craft programmes
I could hardly write a craft blog if I didn't enjoy these. She's got a bit more into the Vintage area now, but I especially adored her Handmade Christmas series. They're all brimming with ideas and beautiful images.
 
The White Queen
Oh Wow. I love it. The history, the costumes, the strength of all of the female characters, Aneurin Barnard... I fell for it hook, line and sinker. Next up, the books! (Yes, I know, I've done it in the wrong order but I didn't think that I would love it this much!)


Sunday 25 August 2013

25th: Christmas Card 8

This is the last of my last year's Christmas Cards, I hope to get this year's done before this time next year!
 
Equipment:
White Card
Candy Cane embellishment
Corresponding Striped Paper
Foam Pads
Outline stickers
 
1) Fold the White card to an A5 Card Blank.
2) Trim another piece of white Card to fit the candy cane. Attach the candy cane with foam pads.
3) Trip a piece of the striped paper to matt the candy cane panel. I usually trim so that there is a 0.5 cm border around. Attach the panel with foam pads.
4) Arrange the stack of paper in the top right corner of the card and attach with foam pads.
5) Below, add a sticker with the words 'Christmas'

This one is simple but effective, I think. I like how the stripes match.

Apologies for yesterday...

I failed my challenge.
 
I got back from my holiday late on Thursday, and spent Friday running around, speaking to my form tutor about my As Results (put it this way, I'm not going to Cambridge. But they're not horrendous),and then my first driving lesson. And yesterday I got caught up in writing my History Coursework and it completely slipped my mind.
 
I'm sorry.
Not much lost, really, but I'm sorry.
I hope to finish the rest of this challenge blip-free.

Friday 23 August 2013

Camera Experiments: Pylons


The large, imposing structures of telegraph pylons on our landscape..... Strangely beautiful... Eerily cold and unfeeling.
 
The fear of walking under one as thunder rolls behind you.
Oh what we do for art.


Thursday 22 August 2013

Guest Post by Katie at Running With A Glue Gun

Hey! Today I have something very special for this little blog: it's very first guest post! I'm so very excited, but for now, I'm just going to pass over to Katie.
 
 
Hello Everyone,
I'm so excited to be guesting blogging at Crafts From A Ravenclaw. My name is Katie and I write little blog call Running With A Glue Gun. Today I will be showing you guys how to make your own mini moon banner.

So Lets Get Crafty!

Supplies
9 Round Wooden Circles
Black Paint
Grey Paint
Paint Brush
Drill
Embroidery Thread
Scissors (not pictured)


Step 1: Drill two small holes on each side of your wooden circles.


Step 2: Then paint all of your wooden circles black.


Step 3: Once your circles are dry, go and google ''phases of the moon''. When you find a picture/chart that shows each moon phase, print it out. This will help you keep track of what each phase looks like.

Then begin painting each moon phase with your grey paint. I also added a little bit of grey glitter to give my moons some sparkle.


Step 4: When your moons are dry, you can then start connecting them together. To do that, just cut a small piece of embroidery thread and feed each end through the back of two of your wooden circles. Then tie a knot in the front. Keep repeating this step until all your moons are connected.

Once all your moons are connected, go and add some embroidery thread to the ''black''moons on each end of your banner. This will create the loops to hang your banner.

Then Your Done!

I hope you all enjoy the diy and thanks Rachel for letting me guest post!
 
Isn't it gorgeous? As a physics student, I love it, but it's equally as mystical as it is geeky. Thank you so much, Katie!